In this article:
Link types and statistics
There are a few type of links you can decide to insert in your email. In the application, we offer the major three: URL, anchors and e-mails (mailto).
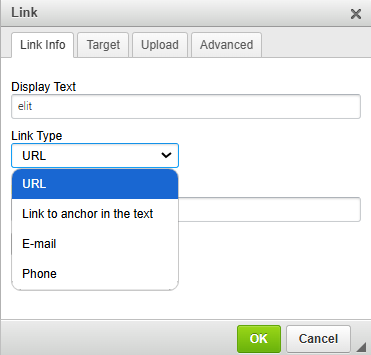
- URL: Create a link to a website, to open a file (ex.: PDF file) or to make a phone call. To use this link type, enter the web address leading to your website in the URL field. To link to a file that is not already hosted on the web, follow the instructions here. Learn how to trigger a phone on click, here.
- Link to anchor in the text: Create links toward different sections of your email. It's often used to build a table of contents.To add an anchor to your text, follow the procedure found in this link.
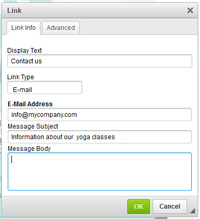
- E-mail (also known as mailto): Add a link to an e-mail address. To use this link type, you will need to fill in the different fields regarding the address your link will point to and if needed the subject of your e-mail. You could also add informations regarding the content of your e-mail. Pay attention to special caracters: they are not always supported!
-
Phone: allows you to create a link that automatically dials a phone number when clicked. To use this type of link, select URL from the Link Type dropdown menu and enter the information in the URL field.
Link statistics
While all of the types listed above are supported in e-mails, we can only track statistics on URL type of links.
Learn more about how to properly test your links >
How to add a link on text
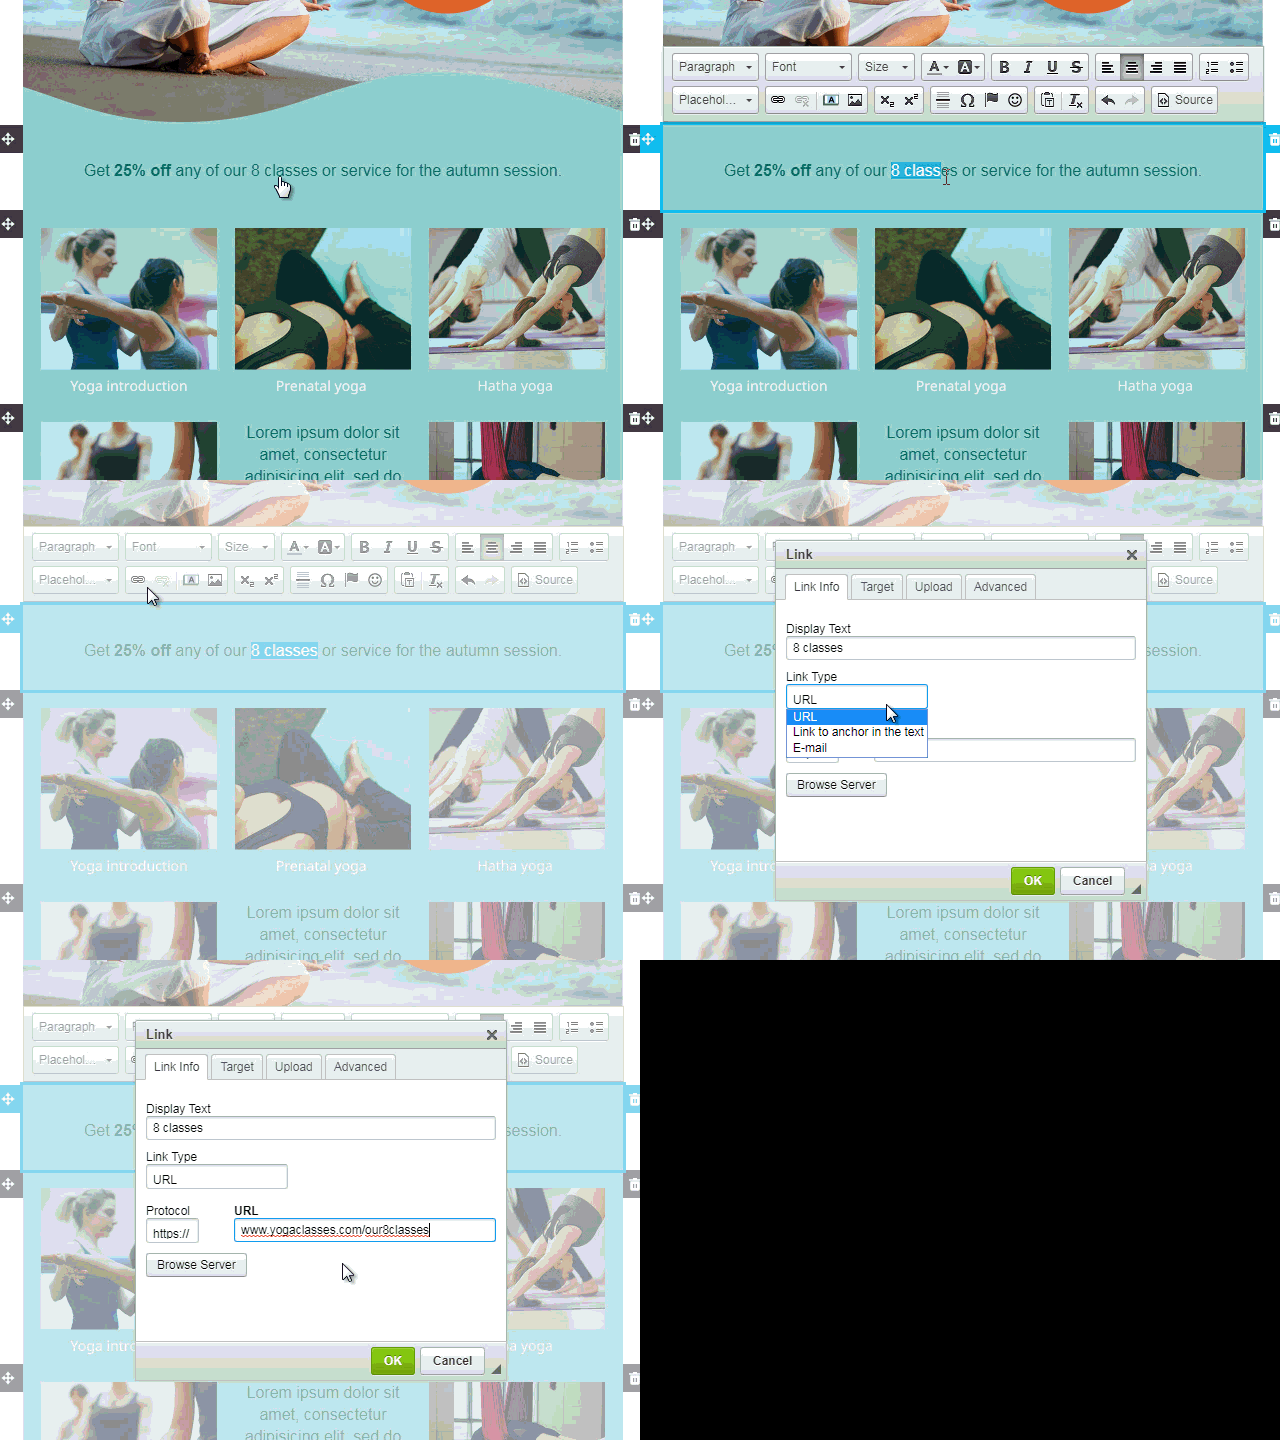
- Click where you would like to add your text.
- Write down the sentence or words on which you would like to put your link.
- Highlight the sentence or word on which you would like to add your link.
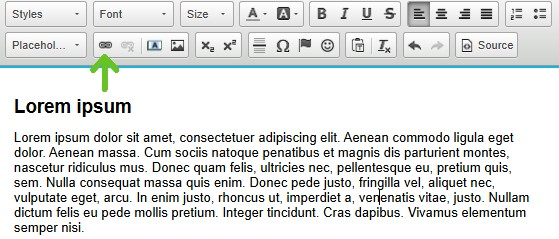
- Select the Link button in the toolbar (the little chain icon). The link properties window will open.
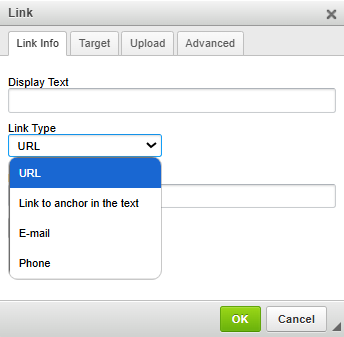
Learn how to set the target of your link > - Make sure that the link type chosen is set to URL. If this is not the case, click on the word below Link type and choose URL in the drop down menu.
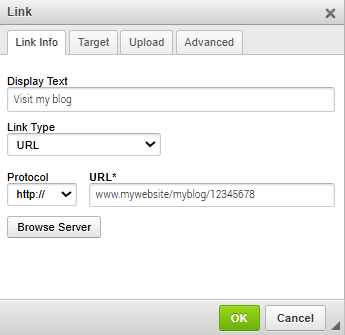
- In the URL field, enter the web address then click OK.
- Always test your links before sending out your email!
Learn the different ways to test your email >
How to change the target of a link
The target of a link determines how your link will open.
Here are the different types of targets:
- <undefined>: This option does not define a specific target for the link. The browser's default behavior will apply (for example, opening the link in the same window or tab).
- <frame>: Opens the link in a specific frame on the page if it uses frames (HTML frames). You will need to specify the name of the target frame.
- <popup>: Opens the link in a new browser window or popup, without an address bar or tools (depending on browser settings).
- New window (_blank): Opens the link in a new tab or a new browser window.
- Top window (_top): Opens the link in the top window or tab, replacing the content of any current frames. Useful if frames are used.
- Same window (_self): Opens the link in the same window or tab. This is the default option for links.
- Parent window (_parent): Opens the link in the parent window or tab, exiting a nested frame (if present).
How to change hyperlink styles
How to change link font and size
Depending on where they are, the font and the size of your links are the same as those chosen by default for your texts or titles. To change the default choices of these elements in your text block:
- Make sure your text block is selected (to select it, click on it one time) and open its Text properties in the side panel at the right of your template.
- Then, change the font and size of the Texts or Titles depending wether your links are in a paragraph or title.
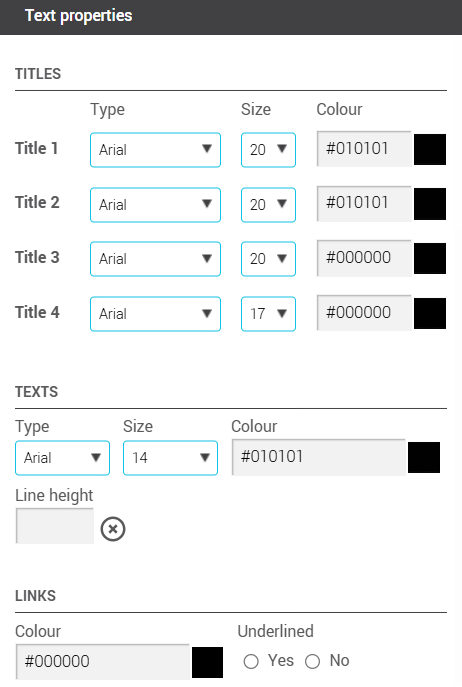
If you rather wish to select a font and size for your links that is different than your default choices, follow these steps:
- Select your hyperlink text.
- In the tools above the text block, change the font and/or the size in the drop-down list. You can also add formatting options such as bold.

How to change the link color
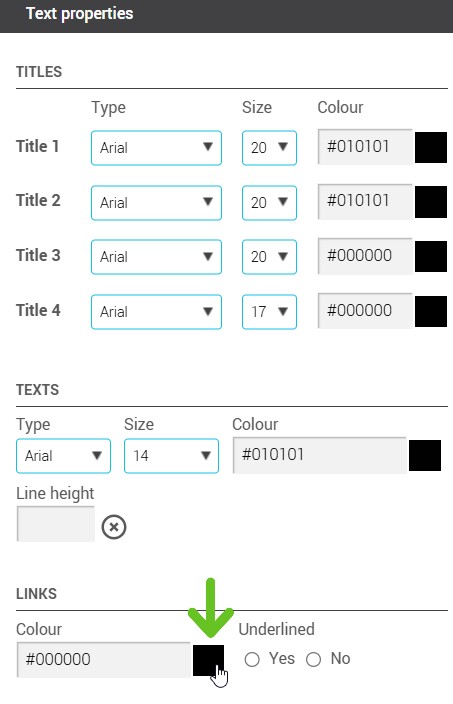
- Make sure your text block is selected (to select it, click on it one time) and open its Text properties in the side panel at the right of your template.
- In the Links section, click the square to pick a color or enter directly the hexadecimal code of the desired color.
How to remove the link underline
There is two ways to remove the link underline:
Here's how to remove the link underline manually:
- Double-click on the link you wish to edit. The link properties window will open.
- Go in the Advanced tab.
- In the Style field, enter this text:
text-decoration:none;
If there is already something written in the Style field, enter a space after the last semi-colon and copy-paste the text above there.
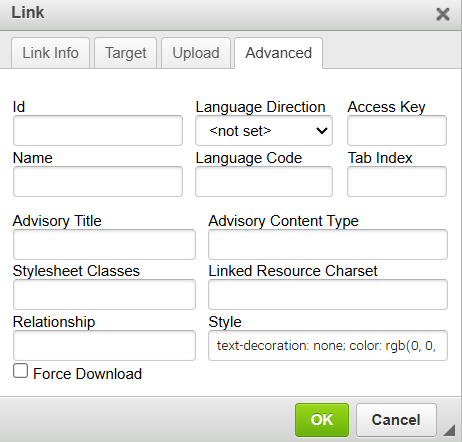
- Click OK to save the changes.
- Don't forget to test your link.
Here's how to remove link underline
- Click the block where your link is.
- Go to Block properties > Text properties > Links.
- Check No under the Underlined option.
.png)
How to add a link on an image
Learn how to add a link on an image if it is:
If your image is in an image block:
- Click on the image block in which you wish to add your link.
- In the side panel at your right, go in the Image properties section.
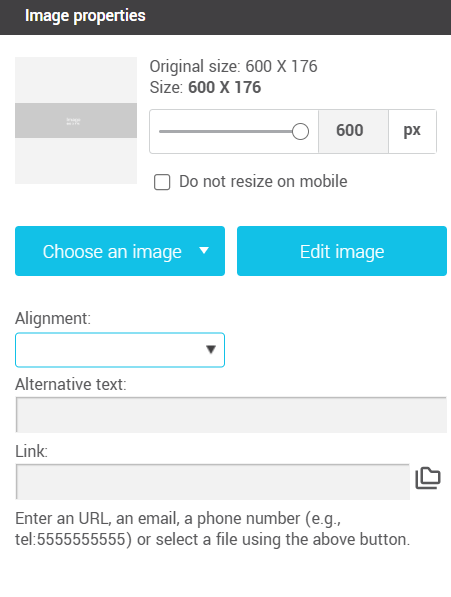
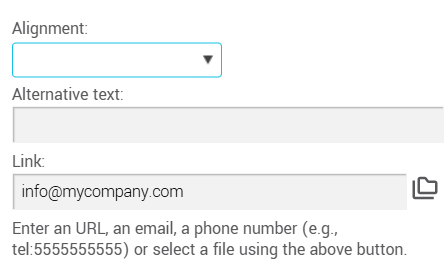
- Enter the web address in the Link field.

- Don't forget to test your link!
Learn the different ways to test your email >
If your image is in a text block or if you have created your own HTML email:
- Click on the image on which you would like to add your link in your text zone to select it.
- Click on the Link button represented by the chain icon in your toolbar. The link properties window will open.

- Make sure that the link type chosen is set to URL. If this is not the case, click on the word below Link type and choose URL in the drop-down menu.
.png)
- In the URL field, enter the web address then click OK.

- Don't forget to test your links before your mailing!
Learn the different ways to test your email >
How to add a phone hyperlink
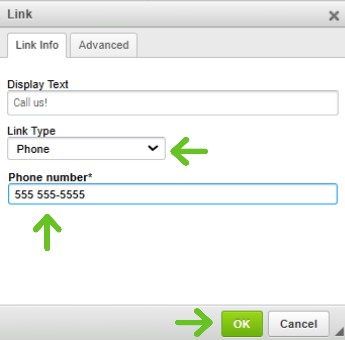
It is possible to add a link that will trigger an action to dial a phone number. Here's how to do it:
- Follow the steps #1 to 5 here.
- Change the link protocol to Phone.
- Enter your phone number in the URL field as shown in the example below:
555-555-5555
- Don't forget to test your links before your mailing!
Learn the different ways to test your email >
How to edit a link on a text or button
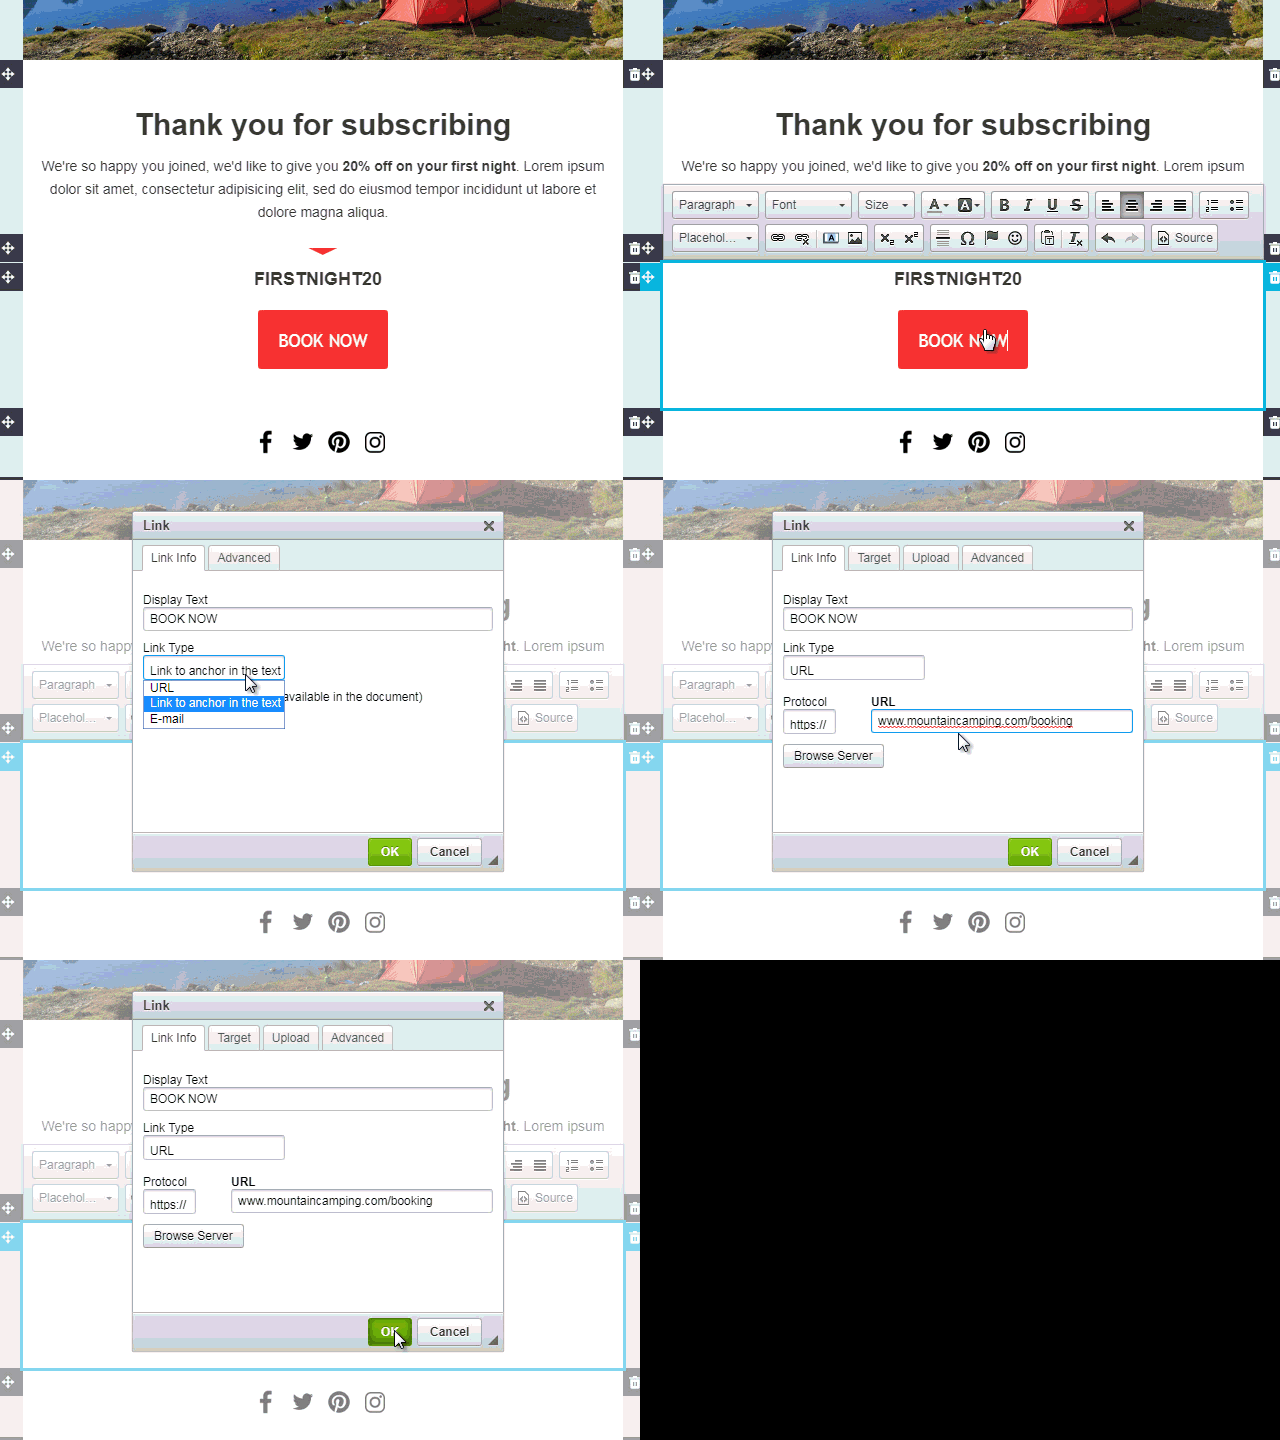
- Double-click on the link or the button you wish to edit. The link properties window will open.
- Make the desired changes. If you don't see the URL field, change the link type to URL.
- Click OK to save your modifications.
How to delete a link
To delete a link, simply highlight the sentence, word or button on which your link has been associated, then select the button displaying the link icon with the small x.
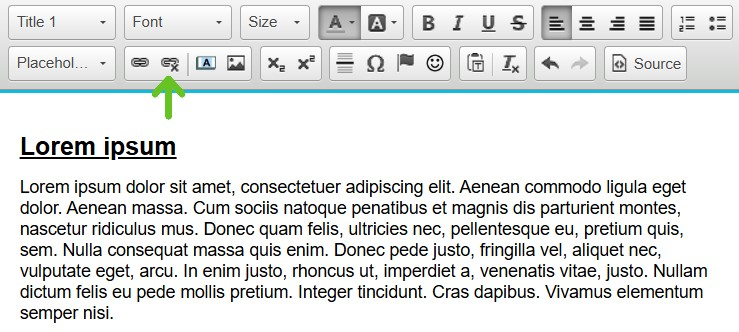
This will allow you to simply remove the link without erasing your sentence, word or button.
How to change the link target
The link target determines the way your link will open after being clicked. To change the link target:
- Double-click the link or button to edit. The link properties window will open.
- Open the Target tab.
- Click the field below Target to open a drop-down list of choices.
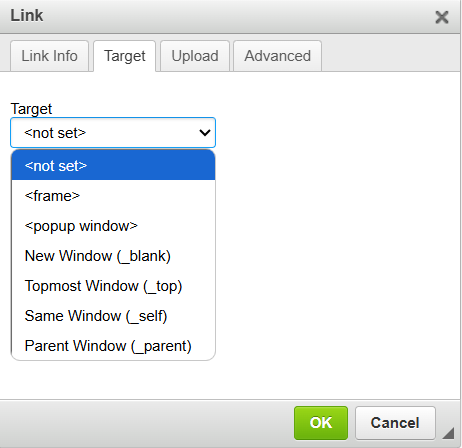
- Select the option you want.
- Click OK to save your changes.
